Stump Removal
Defining Stump Removal
After the heavy lifting of removing a tree piece is completed, what’s left behind is the sturdy stump that once holds the tree in place. Stump removal involves a more laborious process than cutting down a tree, which is why most owners prefer to leave old stumps to sit in their yard.
Stump removal could be a troublesome job, especially when removing it may result in destroying your yard or when you lack the proper tools and equipment to do the job. But the good news is that it is doable.
With the right methods and techniques, and of course, by hiring the best Tree Care Service team (in this case, tree service Corpus Christi, Texas), you’ll get the job done more quickly and easily. We in Corpus Christi, Texas Tree Care Service, are best prepared for this job.
Why Tree Stump Removal Is Essential
An old tree stump might not cause problems first, but the longer you let it stick around, the more it can become a nuisance. An old stump may become a stumbling block when you are mowing your lawn. It may prove hazardous as well for you and your family members.
There are advantages and disadvantages to tree stump removal. Nonetheless, it is always advised that when there is tree stump projecting from the ground after trees have fallen or cut, they ought to be removed as soon as possible.
More so, most experts would agree that if you want a removal course, it’s ideal to know exactly what you’re getting into. Perhaps, you’ve recently had a damaged tree removed from your lawn and now want to remove the remaining roots.
Or maybe, you’ve had an existing stump on your lawn for years and are now looking to update your landscaping. Whatever your reason or experience is, stump removal has always been proven to work best!
A few of the top reasons to remove tree stumps from your yard include:
The most common reason why tree stumps should be removed is that they are undeniably an eyesore. Stumps will make a beautiful yard look ratty. No one likes gazing into a yard and seeing old stumps dotting into the landscape.
They even look worse when weeds and other plants start growing on them, which is most likely the case over time. Moreover, a decaying stump isn’t so pleasing to look at.
Aside from it can throw off the whole look of your yard; it can even affect the value of your property. Tree stump removal is a feasible option to enhance the look of your yard quite easily.
For landscape enthusiasts, tree stumps take up yard space that could be better used for new growth or more exciting features.
For instance, if you’re planning to plant news trees, add a pool or build a playground, or create a garden space – a stump would get in your way. So, if you want to make the most out of your yard, never hesitate, therefore, in hiring a licensed professional.
Safety is the most crucial reason you shouldn’t delay removing tree stumps in your yard. Some stumps are easily seen, but others get camouflaged by grass, weeds, and other plants and become tripping hazards.
When you mow your lawn, the stump or roots could damage your mower if you accidentally roll over them. And, nothing is worse than stubbing your toe on an old tree stump. A tree stump can also turn into a liability if a neighbor or visitor has a misadventure in your yard.
If you leave your tree stump as it is, it will slowly decay. Soon, tree stumps will attract insects and other vermin and harbor diseases that can spread to other tree lives. Tree stumps will spread rot and invite unwelcome creatures to your yard.
For example, termites, scarabs, woodworker ants, and various pests are particularly attached to tree stumps. If your stump is infected, it is likely to spread to healthy trees or bushes in your backyard. The wood in your home may also be in threat!
A tree stump can also grow parasites that are harmful to pets and your children. It is ideal for removing the whole stump to prevent rot or infected wood from spreading. Your yard’s well being depends on it.
While it’s true that live trees can also be vulnerable to infestations and disease, tree stumps are especially vulnerable. Therefore, removing tree stumps can be your best option to avoid problems along the way.
Tips for Tree Stump Removal
There are several reasonable justifications for removing a tree stump. But perhaps, the most significant considerations to remember before removing a tree stump are the style of your house, the health of your existing flora, and also the health of your friends and relatives.
Professional arborists can manage to tree removal, remove tree stumps, and roots straightforward using effective techniques. Here, we isolate the significant steps in the entire process so that you can all the more possibly determine whether the removal of the tree stump is the best choice for you.
To properly remove tree stumps, you need to burrow around the roots. Utilize a scoop to dig close to the stump and slowly uproot the tree together with its roots.
Uncovering the roots underneath the surrounding soil first is essential for the entire tree to be removed and mitigate further destruction of your yard.
Move all over the stump circuit and continue digging until you’ve discovered all the most significant roots around the tree. Burrow deep on each side of the roots to expose them as soon as might be predicted.
If you’re lucky enough that the roots tend to be big and thick, and it’s hard to expose them, try an effective root removal strategy. Burrowing strategy works well whenever you’re able to expose the roots down to their ends.
- Cut the roots down. Use loppers or a root saw to cut them into pieces, depending on the roots’ height. Break them into rational bits and pick out what you can from the ground.
Throw them down as you go, taking as much of the root structure as you might have predicted. Using a hatchet to cut the roots is possible but not recommended since it will split dangerously if it hits a plant. Much of it will end up trapped between the roots if it is not exposed. - Pull the roots out. Use a grub digger to torque the remaining roots from the earth to their ends. In the unlikely risk that you have to make more cuts when you go, do it — it’s going to make it easier to pull them out of the field. Prop up until you’ve expelled all the essential seeds, go back to that stage, and take out whatever’s left.
- Remove the stump. All things included or the large proportion of the roots have been cleaned, you should have the choice to cut the stump effectively.
You will need to use the scoop to burrow beneath the stump and remove a few more roots underneath it before you can get it out. After all the wood has been evacuated, you should cleave it and add it to your heap of fertilizer. - Close up the void. The last move is to cover the void with topsoil or sawdust. In the unlikely possibility that you would forget to do so, the ground surrounding the opening would crumble, and you will have a big stain on that spot in your yard.
If the dirt or sawdust settles, the dirt is absorbed in a piece, so you will need to begin applying it to the area at regular intervals until the soil stays even.
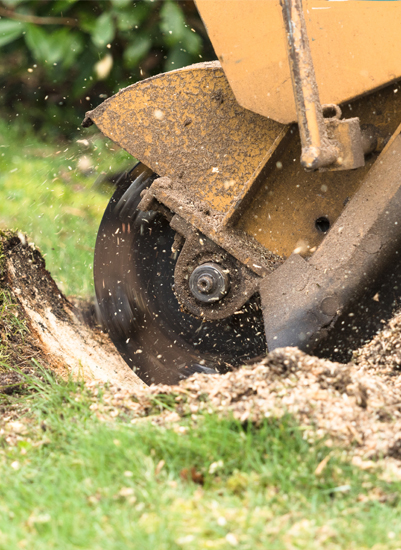
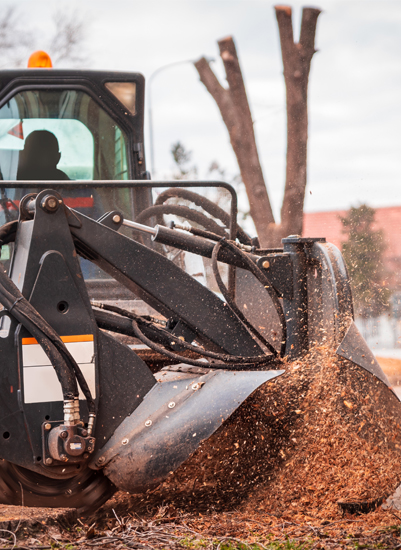
- Find the stump processor. This machine crushes stumps and their root frames to a depth of about a foot under the earth. Stump processors can be continuously rented from computer investment resources.
If you happen to be heading towards not running the computer yourself, you should find someone to go to your property with a stump processor to carry out the responsibility for you.
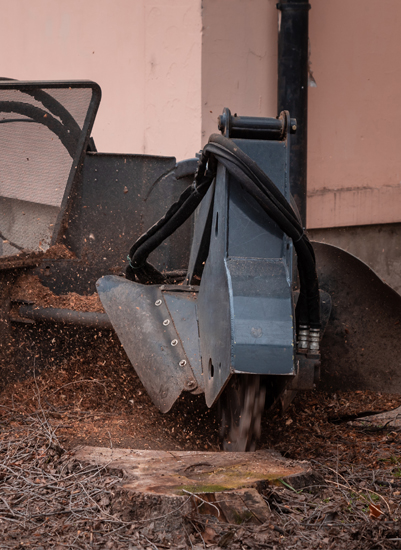
You’re expected to wear masks, headphones, and ear defenses on the possibility that you’re going to operate the computer yourself. - Place it over the stump and start crushing it. Adhering to the directions of the producer, position the stump processor, and turn it on.
It would crush the top of the stump and work its way back to the field to crush the roots. You’re going to have to pass the stump processor across the circumference of the stump to connect with aeronautical roots as well. - Scoop out the grindings. The land will repair itself all the more easily on the risk that you can remove the built-up timber. Scoop it out and put it in your heap of manure, or discard it in another way.
- Fill in the gap. Suppose grinding with dirt or sawdust to cover the void. Keep adding matter to the region, as it will deter you after a bit.
- See if it is permissible to cut the stump. There could be limits to open flames in your general vicinity, mainly if you reside in a projected situation. Before you start, contact the nearest local firefighter community to make sure it’s safe to eat your stump.
- Gather a fire of wood on the top of the stump. It could be good to go through all the hacked trees that you chop down as fuel to absorb a fire on the exit head. Spread the wood on the end of the stump. Fill the stump with more wood since the stump can be at the focal point of the flames.
- Keep the fire alive. It’s going to take several hours to eat the stump. Continue to add more wood to keep the fire giant and heavy. Keep it burning for any amount of time it takes for the stump to land and catch fire.
- Remove the particles. After copying the stump, remove the debris from the opening and dispose of it.
- Fill in the opening. Remove particles of dirt or sawdust. Keep adding substance to the region as it drops at frequent intervals.
- Drill the holes in the stump. Using a drill with a complete piece to create a development of the stump’s head’s holes. The stump will keep the synthetic compounds in place across these holes, making sure you space them equitably.
- Using the Stump Remover. Many of the stump pullers are made of potassium nitrate powder, which reacts more quickly to mellow and rot with the wood.
- Get your children and pets away from the log. If stump removal powder is swallowed, it will damage children and livestock, so make sure they don’t get close to it.
- Screen the stump. It’s expected to start mellowing and spoiling in half a month. When you deem it to be appropriately fragile to expel, it’s a perfect chance to complete the operation.
- Please cleave it up. Using a hatchet or a scoop to crack a relaxed stump. Discard the pieces when you cleave them down. Prop up until you level the stump.
- Destroy and burn the rest of it. Make a fire over the rest of the wood and let it torch as far as possible. You’re going to evacuate what’s left of the stump and the underlying roots around these sides.
- Remove the cinders from the soil. Uncover what’s left since the fire has been copied and disposed of. Top the hole with topsoil or filler, equivalent to sawdust. Continue to provide additional material for the next six months before the land remains clear.


